Lift the Weight Elements
- Using Video: Color the Wind Festival
- Metaphor Walkthrough: The Kite
- Facilitating the Activity: Number Grid
- Resilience Booster: Design Your Kite
Lift the Weight Vocabulary
- Resistance
- Expectations
- Responsibility
- Routines
Lift the Weight Learner Objectives
- I can explain how the kite metaphor (resistance) applies to rules, expectations and responsibilities.
- I can explain what an expectation is using examples (rules, laws, commitments, schoolwork, chores, routines).
- I can explain what responsibility means (being dependable, making the choice, and being accountable for the expectations).
- I can explain how responsibility and expectations help me find success.
Metaphor Walkthrough:
Show the overall metaphor:
Explain to your students that this is a picture of a beach kite. Ask students if you were to fly a kite, what would you need? (students should be able to verbalize the kite, string, and someone to hold the string or an anchor).
Point out that in the visual metaphor on display you can see all three of these things. Students may or may not bring up wind. If you want to include the wind, then feel free to do so; but it is not necessary for the metaphor explanation.
Connection: If you have taught the motivation formula, you can easily reference the wind and the sails as part of this metaphor as well.
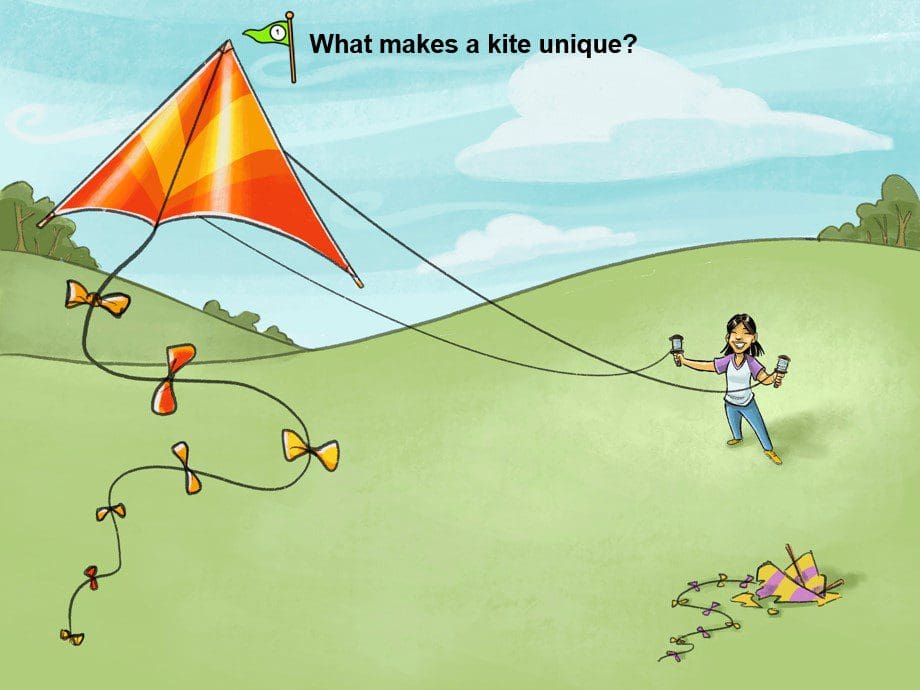
Flag #1 (the kite)
We are going to imagine for a moment that the kite represents each one of us. Take a moment to frame the rest of the metaphor by asking some fun questions about the kite representing each individual student.
The following questions could generate some good examples:
- What makes a kite unique?
- What are some of the different shapes of kites?
- What are some of the different designs or images on kites?
- What would be cool about being a kite?
Flag #2 (the guide ropes)
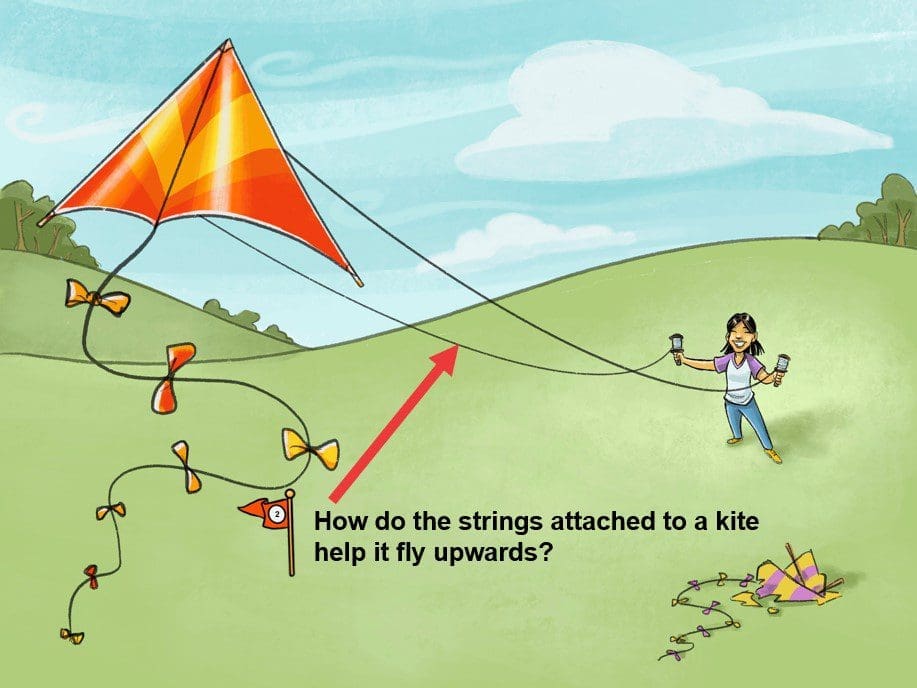
Display the images of the kite strings. Ask: How do the strings attached to a kite help it fly upwards? Students may or may not be able to vocalize exactly the role a kite string plays in flying a kite. After students generate some ideas or thoughts, follow up with the following questions to drive the conversation:
If you throw something like a kite into the air on a windy day, what will happen? (fly for a bit and fall to the ground, get blown into a tree, go into the sky and eventually fall)
How does the string help the kite then? (helps it rise higher and higher without crashing or getting stuck)
Explain the resistance the kite line creates allows it to fly against the wind. The wind is pushing the kite away, while the line pulls it back. This resistance allows it to move up into the air. In fact on professional kites, there are multiple lines that do different things. Some allow it to move left and right, or up and down.
Explain that we have lines in our life as well that feel like they are pulling against us. Just like the kite could feel like the kite string is trying to pull it back toward the ground or holding it back, in reality it is designed to help the kite climb higher and higher.
Ask this key question: What are examples of kite lines in our life that feel like they control us or hold us but are actually helping us? It’s always fun to see if students will bring up examples of rules, routines, tasks or other items that fall under the key concept: responsibility and expectations. If a student brings up an example that is an example of an expectation (rule, chore, schoolwork, routine), then use that to transition. If not, then lead out with some examples.
These lines can definitely represent the expectations that are given to you every single day. Define the words responsibilities and expectations for your students.
Responsibility: the accountability for completing certain tasks or following certain rules.
Expectations: the tasks, rules, routines, and promises we make.
We have expectations in different areas of our lives. We have them at home, at school and even in our community.
FACILITATE THE ACTIVITY: Number Grid (3rd)
Number Grid
Overview:
In this activity we will do a simple activity to illustrate how guidelines (like the kite lines) can help us better achieve our goals. Students will be given a paper filled with numbers but with no lines. They will be tasked with finding as many numbers in numerical order as possible within a time limit. You will then have them draw in several lines which will then allow them to use a pattern to find the numbers much quicker.
Materials:
Instructions:
Pass out the number grid paper per student and ask them to keep the paper face down. Another option is to pass them out face down and ask them to not touch the paper. Explain that when you say go students will turn the paper over and immediately try to find as many numbers as possible within 60 seconds. Explain that they have to go in numerical order. They cannot move on to the next number until they find the preceding number… 1, 2, 3, 4…
After you say go, start the timer and observe. If students follow your instructions they will get into the 20s if they are lucky. There are a total of 72 numbers. When they are finished ask them to turn their paper back over and find out who found the most numbers. Explain to students that while some were able to find some numbers, no one found all the numbers. Share with students that there is a way everyone could find all or almost all the numbers in the same amount of time.
Using a sheet of paper as an example, ask your students to follow your example of folding their number grid paper. You will then, fold by fold, have your students fold the paper in line with your own. The instructions for folding the paper are as follows:

- With the paper lengthwise (hotdog style) have them take the left top and left bottom corners and fold the sheet over about a third of the way. Crease.
- Take the top right and bottom right corners and fold them over to cover the exact same area. Crease.
- Fold the paper in half. Crease.
- Fold the paper in half again. Crease.
Ask the students to unfold the paper now. There will be lines created by the folds. Optionally, you can have your students use a pencil to draw a line in the folds so they can better see the lines created by the folds. If done correctly you should have a total of 12 squares.
Explain to students that these lines help you see a pattern on where to find the numbers. The next number you are looking for will always be in the next square over, top to bottom. So the first number will be somewhere in the first square, the second number will be somewhere in the second square, the third…. (look at the diagram if you need clarification). Explain that you will give them 60 seconds again and to see how many numbers they can find.
At the end of 60 seconds, most students will either finish or at least double the amount of numbers they found in the first round.
Important note: If you are worried about your students ability to follow the folding directions accurately, you can always have a second set of number grids prepared with the lines drawn in.
Process the activity:
- What made finding the numbers difficult in the first attempt?
- What changed that made it easier?
- How did the lines help you?
- We’ve been talking about ‘kite lines’. What do these lines and kite lines have in common? How do they both help us?
- What are some examples of rules and routines that help us be more safe, successful and healthy every day?
METAPHOR WALKTHROUGH CONTINUED:
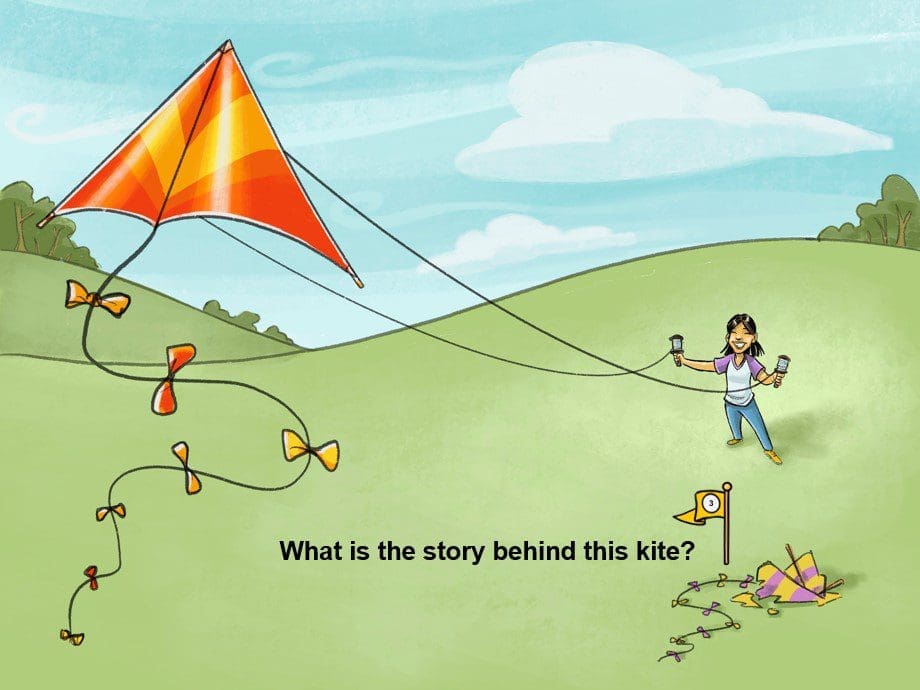
Flag #3 (no guide ropes)
Ask the following questions: What do you see in the metaphor here? What is the story behind this kite? Students may come up with different responses regarding the kite. The concept to reinforce is that without the kite lines that help guide the kite higher and higher into the air, the kite will fall to the ground. Once that principle has been surfaced, use some of the following questions to process:
- What needs to happen to fly a kite if it has fallen to the ground?
- Can anyone explain in their own words why the kite lines are so important to keep the kite in the air?
- If the kite represents each one of us and if the kite lines represent routines, rules, tasks and chores, why do these things help us rise higher?
- What does the kite falling to the ground represent?